Spring boot+Mybatis plus+thymeleaf整合记录
介绍:
Spring Boot:
Spring Boot是一个简化Spring开发的框架。用来简化Spring复杂配置简单创建一个产品级的应用。意思就是在使用Spring Boot时只需要配置相应的Spring Boot就可以用所有的Spring组件,spring boot就是整合了很多优秀的框架,不用我们自己手动的去写一堆xml配置然后进行配置。从本质上来说,Spring Boot就是Spring,它做了那些没有它你也会去做的Spring Bean配置。另外Spring boot可以不用配置tomcat就可以直接运行。
Mybatis Plus:
Mybatis-Plus(简称MP)是一个Mybatis的增强工具,在Mybatis的基础上只做增强不做改变,为简化开发、提高效率而生。那么它是怎么增强的呢?其实就是它已经封装好了一些crud方法,我们不需要再写xml了,直接调用这些方法就行,就类似于JPA。
Thymeleaf:
Thymeleaf是一种用于Web和独立环境的现代服务器端的Java模板引擎。
Thymeleaf的主要目标是将优雅的自然模板带到开发工作流程中,并将HTML在浏览器中正确显示,并且可以作为静态原型,让开发团队能更容易地协作。Thymeleaf能够处理HTML,XML,JavaScript,CSS甚至纯文本。
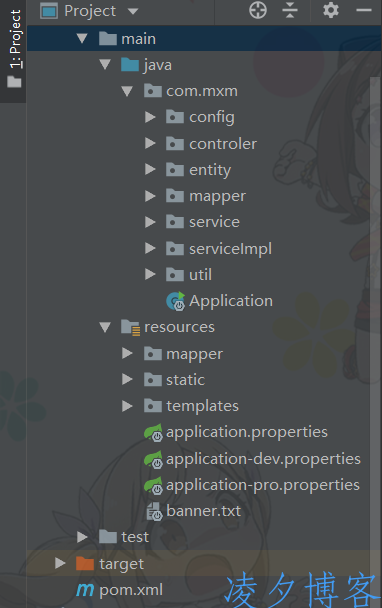
文件结构图:
整合:
首先配置pom.xml文件:
 <properties>
        <project.build.sourceEncoding>UTF-8</project.build.sourceEncoding>
        <!-- set thymeleaf version-->
        <thymeleaf.version>3.0.11.RELEASE</thymeleaf.version>
        <thymeleaf-layout-dialect.version>2.0.0</thymeleaf-layout-dialect.version>
        <!--set java version-->
        <java.version>1.8</java.version>
    </properties>
    <!-- Inherit defaults from Spring Boot -->
    <parent>
        <groupId>org.springframework.boot</groupId>
        <artifactId>spring-boot-starter-parent</artifactId>
        <version>2.0.0.BUILD-SNAPSHOT</version>
    </parent>
    <!-- Add typical dependencies for a web application -->
    <dependencies>
        <!-- spring的web组件-->
        <dependency>
            <groupId>org.springframework.boot</groupId>
            <artifactId>spring-boot-starter-web</artifactId>
        </dependency>
        <!-- spring的Test组件-->
        <dependency>
            <groupId>org.springframework.boot</groupId>
            <artifactId>spring-boot-starter-test</artifactId>
        </dependency>
        <!-- mybatis的orm插件-->
        <dependency>
            <groupId>com.baomidou</groupId>
            <artifactId>mybatisplus-spring-boot-starter</artifactId>
            <version>1.0.4</version>
        </dependency>
        <!--mybatis-plus插件-->
        <dependency>
            <groupId>com.baomidou</groupId>
            <artifactId>mybatis-plus</artifactId>
            <version>2.0.7</version>
        </dependency>
        <!--数据库连接jdbc依赖-->
        <dependency>
            <groupId>org.springframework.boot</groupId>
            <artifactId>spring-boot-starter-jdbc</artifactId>
        </dependency>
        <!--mysql链接依赖-->
        <dependency>
            <groupId>mysql</groupId>
            <artifactId>mysql-connector-java</artifactId>
        </dependency>
        <!--阿里druid数据库链接依赖-->
        <dependency>
            <groupId>com.alibaba</groupId>
            <artifactId>druid</artifactId>
            <version>1.1.9</version>
        </dependency>
        <!-- lombok简化java代配置@Data到对象可简写get/set...方法 -->
        <dependency>
            <groupId>org.projectlombok</groupId>
            <artifactId>lombok</artifactId>
            <version>1.16.20</version>
            <scope>provided</scope>
        </dependency>
        <!--配置thymeleaf模板引擎-->
        <dependency>
            <groupId>org.springframework.boot</groupId>
            <artifactId>spring-boot-starter-thymeleaf</artifactId>
        </dependency>
        <!--配置thymeleaf模板引擎HTML5非严格-nekohtml-->
        <dependency>
            <groupId>net.sourceforge.nekohtml</groupId>
            <artifactId>nekohtml</artifactId>
            <version>1.9.22</version>
        </dependency>
        <!--servlet -->
        <dependency>
            <groupId>javax.servlet</groupId>
            <artifactId>javax.servlet-api</artifactId>
        </dependency>
        <dependency>
            <groupId>javax.servlet</groupId>
            <artifactId>jstl</artifactId>
        </dependency>

    <!-- 作为可执行文件打包 jar -->
    <build>
        <plugins>
            <plugin>
                <groupId>org.springframework.boot</groupId>
                <artifactId>spring-boot-maven-plugin</artifactId>
            </plugin>
        </plugins>
    </build>
配置application.properties文件:
#默认启用开发环境配置
spring.profiles.active=dev
#启用生产环境配置
#spring.profiles.active=pro
配置application-dev.properties(记录开发时的配置),application-pro.properties(设置发布时的配置)。本次只配置开发时的配置:
#设置web启动时访问端口号
server.port=80
#Spring数据库配置
spring.datasource.type=com.alibaba.druid.pool.DruidDataSource
spring.datasource.url=jdbc:mysql://localhost:3306/test
spring.datasource.username=root
spring.datasource.password=root
spring.datasource.driver-class-name=com.mysql.jdbc.Driver
spring.datasource.max-idle=10
spring.datasource.max-wait=10000
spring.datasource.min-idle=5
spring.datasource.initial-size=5
#mybatis plus 设置
mybatis-plus.mapper-locations=classpath:/mapper/*Mapper.xml
#实体扫描,多个package用逗号或者分号分隔
mybatis-plus.typeAliasesPackage=com.cn.restyle.entity
#主键类型  0:"数据库ID自增", 1:"用户输入ID",2:"全局唯一ID (数字类型唯一ID)", 3:"全局唯一ID UUID";
mybatis-plus.global-config.id-type=2
#字段策略 0:"忽略判断",1:"非 NULL 判断"),2:"非空判断"
mybatis-plus.global-config.field-strategy=2
#驼峰下划线转换
mybatis-plus.global-config.db-column-underline=true
#刷新mapper 调试神器
mybatis-plus.global-config.refresh-mapper=true
#数据库大写下划线转换
#mybatis-plus.global-config.capital-mode=true
#thymeleaf start
spring.thymeleaf.mode=LEGACYHTML5
spring.thymeleaf.encoding=UTF-8
spring.thymeleaf.servlet.content-type=text/html
#热部署文件,页面不产生缓存,及时更新
spring.thymeleaf.cache=false
数据源配置:
/**
 * 数据源配置
 */
@Configuration
public class DataSourceConfig {
    @Bean(name="dataSource")
    @ConfigurationProperties(prefix="spring.datasource")//获取配置文件指定前缀的内容
    public DataSource dataSource(){
        return new DruidDataSource();
    }
    // 配置事物管理器
    @Bean(name="transactionManager")
    public DataSourceTransactionManager transactionManager(){
        return new DataSourceTransactionManager(dataSource());
    }
}
MyBatis配置:
@Configuration
//扫描dao或者是Mapper接口
@MapperScan("com.mxm.mapper*")
public class MybatisPlusConfig {
    /**
     * mybatis-plus 分页插件
     */
    @Bean
    public PaginationInterceptor paginationInterceptor(){
        PaginationInterceptor page = new PaginationInterceptor();
        page.setDialectType("mysql");
        return page;
    }
    /**
     * SQL执行效率插件
     * 性能分析拦截器,用于输出每条 SQL 语句及其执行时间
     */
    @Bean
    @Profile({"dev","pro"})// 设置 dev pro 环境开启
    public PerformanceInterceptor performanceInterceptor() {
        return new PerformanceInterceptor();
    }
}
创建对象类:
@Data
@TableName("user")
public class User{
    @TableId(value="id", type= IdType.AUTO)
    private Integer id;
    private String name;
    private String url;
}
创建mapper接口:
public interface UserMapper extends BaseMapper<User> {
}
路径/resources/mapper下创建mapper.xml(本文件用于下SQL执行数据库操作):
<?xml version="1.0" encoding="UTF-8"?>
<!DOCTYPE mapper PUBLIC "-//mybatis.org//DTD Mapper 3.0//EN" "http://mybatis.org/dtd/mybatis-3-mapper.dtd">
<mapper namespace="com.mxm.mapper.UserMapper">
    <select id="SelectUser" resultType="com.mxm.entity.User">
            select * from user
    </select>
</mapper>
创建service服务类:
public interface UserService extends IService<User> {
}
创建serviceImpl:
@Service
public class UserServiceImpl extends ServiceImpl<UserMapper, User> implements UserService {
}
创建web类:
@Controller
public class UserWeb {
@ResponseBody
@RequestMapping("/hello")
 public String hello(){
 return "hello";
}
//需要在templates文件夹下创建hello.html文件
@RequestMapping(value = "/hello2")
public String hello2(Model model) {
        String name = "漫小猫";
        model.addAttribute("name", name);
        return "hello";
}
}
路径/resources/templates下创建hello.html:
<!DOCTYPE HTML>
<html xmlns:th="http://www.thymeleaf.org">
<head>
    <title>hello</title>
    <meta http-equiv="Content-Type" content="text/html; charset=UTF-8"/>
</head>
<body>
    <!--/*@thymesVar id="name" type="java.lang.String"*/-->
    <p th:text="'Hello!, '+${name}+'!'">原内容</p>
</body>
</html>
最后创建Spring启动类(启动类需要创建到所有类的父类上):
@SpringBootApplication
public class Application {
    public static void main(String[] args) throws Exception {
        SpringApplication.run(Application.class, args);
        System.out.println("=============启动成功===============");
    }
}
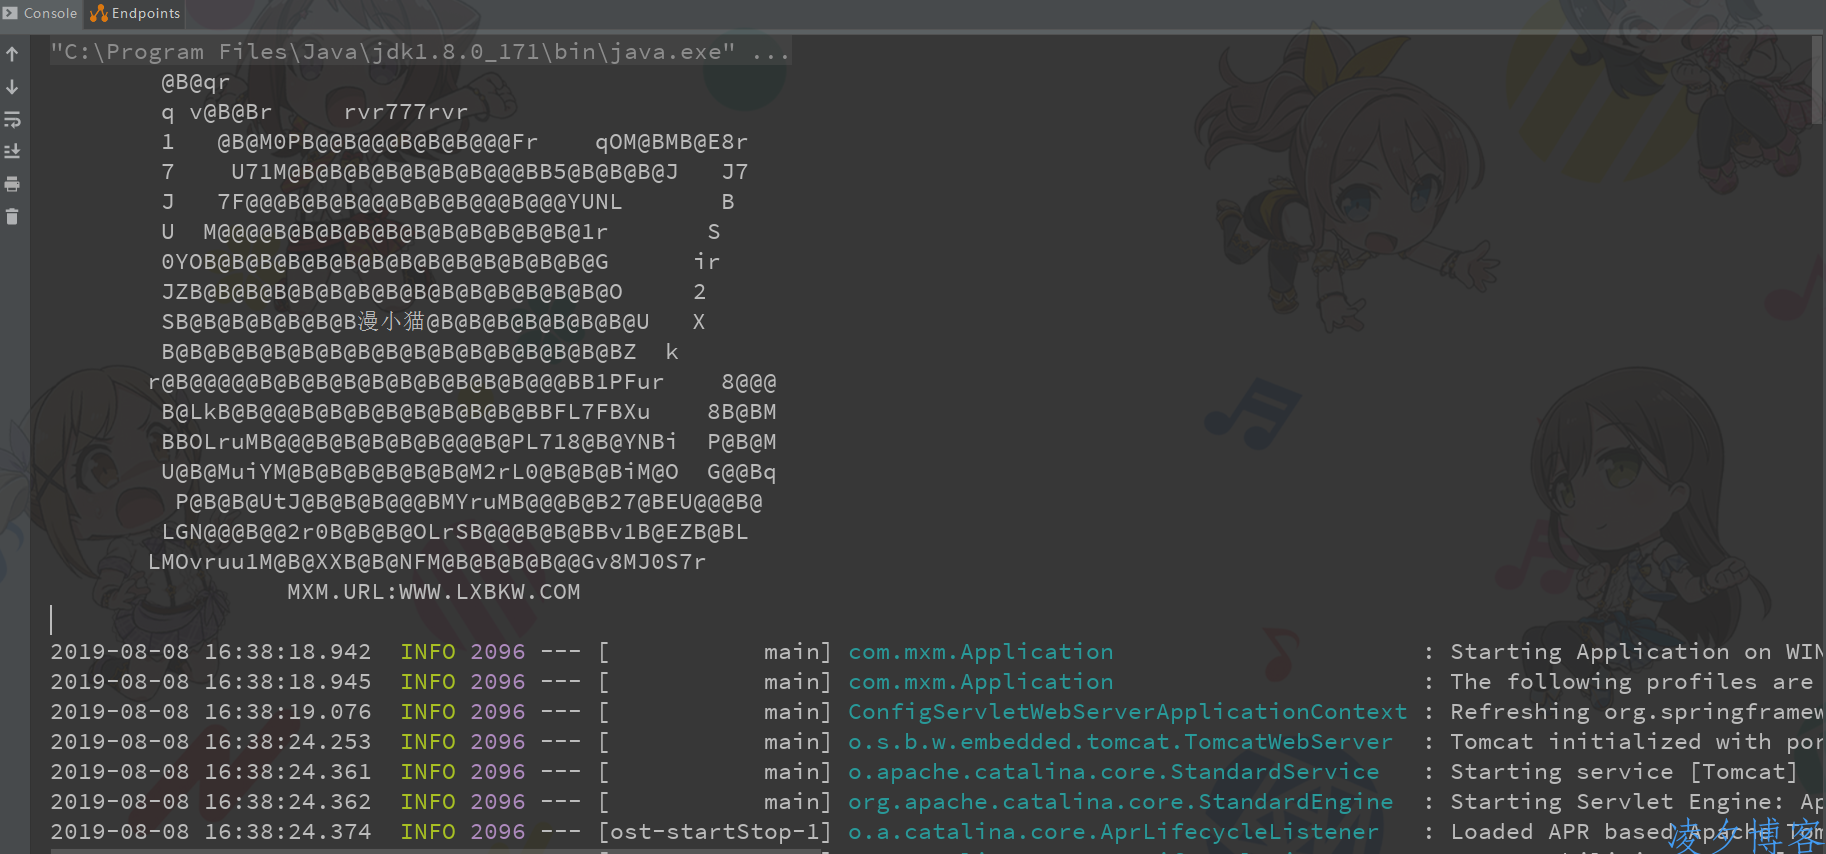
最后启动数据库,只要项目不报错没有别的特殊情况(java是门神奇的语言),项目就能成功启动。
码云整合demo:https://gitee.com/v253508/springbootmybatisplusthymeleaf
注:第一次写这么长的文章,给个好评吧!


 5年前 (2020-03-06)


发表评论